Creating a Painting, Step-by-Step
Before I start the painting I am thinking about the abstract shapes the chickens will create. After finalizing the design, I cut ¼ inch, un-tempered hardboard to size and prime the panel with acrylic gesso, sanding between coats.
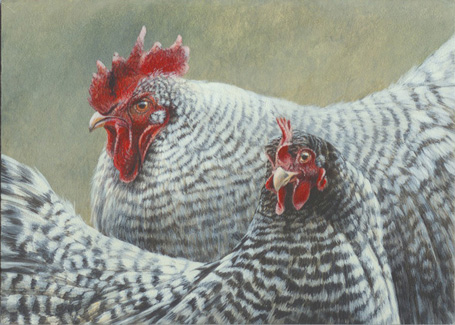
"Chickens"
Acrylic on Board - SOLD
5 X 7 in.
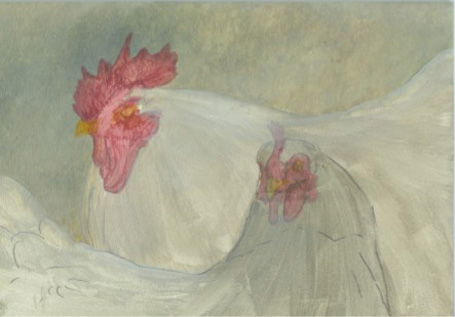
Phase 1: Starting the Painting
After transferring the drawing to my panel, I tone it with a series of yellow/green washes, a color that will be complimentary to the red of the chicken’s faces. I keep the paint very thin at this point.
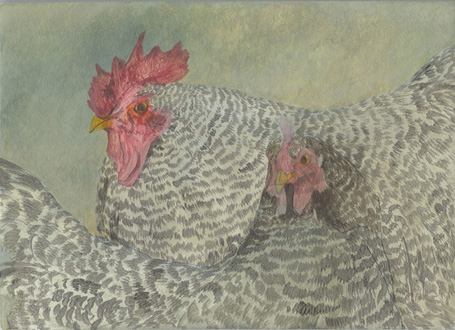
Phase 2:
With the background completed, I start to paint the dark markings of the birds. I am thinking about the shapes of the birds at this stage, painting the markings to follow the contours of the anatomy.
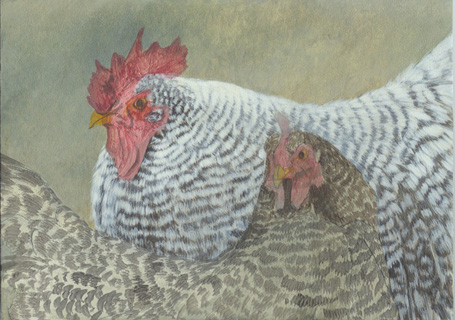
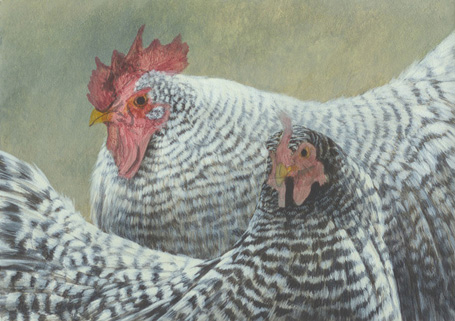
Phase 3:
At this point I have put the light color on the feathers of the rooster. I then complete the plumage of the rooster so I can work from back to front.
Phase 4:
With all of the information about the birds plumage established, I work the entire scene, trying to avoid creating any confusing areas. To do this I wash some areas into shadow, while adding highlights in other areas.
Phase 5: Final Details
To finish the piece, I paint in the faces of the two chickens, building up the highlights and shadows slowly. Finally, I paint the eyes of the birds to give life to the piece.